Smoothing Scratchy Nibs
If a person enjoys writing with a fountain pen, it is probably for several reasons. High on the list is the feel of pen on paper, as it glides effortlessly across the surface. Writing with a scratchy nib, on the other hand, is a less than pleasing activity. Anyone who uses fountain pens regularly has had this other experience. Though we offer our own repair services, as well as complimentary nib tuning on any pen or nib unit purchased from us, I have often been asked if there is anything that can be done at home to cure a scratchy nib. The answer is potentially yes, but I am concerned that the cure sometimes creates more problems than it solves. The following discussion is based on the steps that I take to troubleshoot a scratchy writing pen.
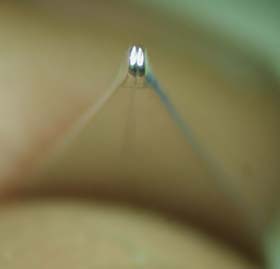
left tine.
If a nib that previously wrote smoothly has suddenly turned scratchy, it has probably suffered some sort of trauma. The most common being misalignment. If bumped or dropped one of the tines can move in relation with the other. This is the first thing to look for. Misalignment puts one tip ahead of the other on the paper, exposing a sharp inner margin of the tipping to the paper. It also can play havoc with consistent ink flow. In order to see the out-of-alignment tipping, a ten-power loupe is necessary for those of us with mortal eyes. The following procedure is only for the brave, who realize that the pen might end up in other hands for the problem to be solved.
Or it is for a pen that is a "trainer pen" not necessarily a "writer".
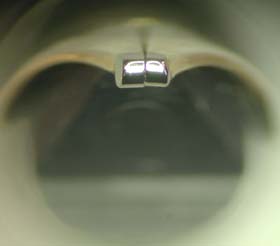
and the left in succession, we see
if the tipping is balanced.
Hold the loupe close to your eye while pointing the tip of the pen toward the loupe. This all occurs within a few inches of your face. Look for a close symmetrical arrangement of the tipping, with both tips at the same level and little or no space between the "iridium" shapes. (A very firm nib will have a very small gap, where a flexible nib will be touching.) If you see one side more than 5% above the other, test the tips by gently moving the low side up with your fingernail. If it moves up an equal 5% amount above the first side, try the other side to see if it moves up again to its original position. If this is what occurs and the tines are of the firm kind, you have a well-balanced nib.
If one side is well above of the other and always averages there, you have isolated the likely reason for scratchiness.
OK, if this is the case, look to see if the nib is centered on the feed. If it is pushed off to one side, the cure could be simple. Gently push the nib back to center on the feed. Push from the middle of the curve of the tine, not from the shoulder and not from the tip. If you have gone too far, gently push again from the other side, this time taking care to move the nib only a small amount. Repeat this process until the slit lines up with the center of the feed. (There are some nibs and feeds that write best when they are not lined up, but that discussion is for another time.)
Always, the test of a well-adjusted nib is on paper and with ink. The ink acts as a lubricant and the paper offers resistance.
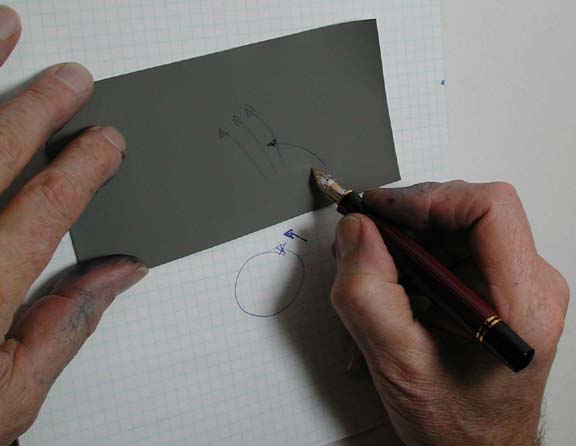
If the nib still feels scratch, it may have sharp corners or edges that are catching on paper. At this point, I like to draw big circles and ask myself where on the circle the scratch is the most pronounced. I put an arrow to show the direction of the circle and, using pencil, mark the part of the arc where the scratch occurs. Then, returning to the loupe or to a microscope if you have one, look for that leading edge. It is most likely on the inner margin, where the slit meets the writing surface.
Now comes the tricky part. You will need some Micromesh 10,000. It comes as 3" by 6" sheets of abrasive on a rubberized fabric backing. I like it, rather than a hard surface abrasive, such as an Arkansas stone or Mylar disks, because it gives, sinking under the weight of the tipping. I like to put the Micromesh on a small stack of newspaper, to add to the cushion and the sinking effect. With ink in the pen, move it on the Micromesh two or three times in the direction of the scratch. Return the nib to the paper and draw that circle again. If you have caught the sharp edge or corner against the abrasive, it should have gone away. Repeat the process taking care to observe the effect of the smoothing with your ten-power loupe.
Warning: Micromesh, even though it leaves a polished surface, is extremely aggressive. Overusing it can remove the tipping material from the end of the nib. This smoothing process can yield the exact opposite from the intended result. It can create a flat foot on the tip, making sharp edges in all directions.
Because another person does often not like one person's tastes in the tip of a pen, the process of smoothing is more art than science. Below is a list of attributes that various tips may contain which will appear positive in one light and negative in another. Understanding these parameters will help the writer in choosing their own compromises.
1. Extra-fine point. Because it is capable of very small marks it is capable of making notes in margins. Currently there are several kinds of throwaway pens that make extremely fine marks and they are not difficult to use. These pens operate in a different way from fountain pens and may be the best solution for some writing situations. But we all know our own reasons for choosing to write with these instruments. Preferred by most of our grandparents, the extra-fine point can be very legible. But, if used with all but the lightest touch, the extra-fine point will have excessive "tooth" and be experienced as scratchy.
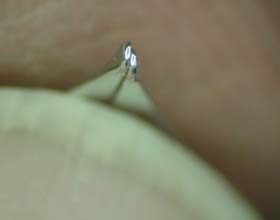
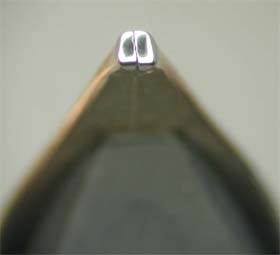
suffers from a couple problems.
First, the tipping is not perfectly
aligned and second, notice that
the place where the ink would
touch the paper is concave and
would not touch.
2. Round inner-margins. Many pens tips today are sold with rounded inner margins. This is roundness at the place where the slit meets the paper. Manufacturers do this to insure smoothness. However, skipping can result. If ink does not reach the paper when the tip touches, the writing can be frustrated with skipping, especially on the initial stroke. Some work with Micromesh can "break in" the tip so that it does not skip. By removing some material from the tip, the slit is brought closer to the writing surface, making the intimate contact between ink and paper possible. (But, see warning above.)
3. Creating a foot. The foot will act as a plane under which the ink will flow. When working with a light pressure, on the right paper and at the right angle, the nib will hydroplane. This effect can happen for one person and not for another. It also can be elusive. The "flat" necessary for this effect, if it has sharp edges can catch and drag. A tip with a foot can be heaven or hell.
4. High-angle foot or low-angle foot. Nibs are created and pens are sold with the average writer in mind. Because the smoothest point will have a rounded but flat "foot" at the angle where the writer tip touches the paper, each person's foot is slightly different. Most people write holding the pen at about 55 degrees above the paper. Those who prefer a higher angle or lower angle may find that the way the tip is cut is not good for them. Again, using smoothing cloth, a new foot can be customized at home, which feels right for the writer. (See warning above.)
5. Wet nibs write smoothly. All things being equal, a wet writing nib will feel smoother than a dry one because the ink acts as a lubricant and the more ink under the tip the smoother the pen will feel. A pen that delivers too much ink can be a nuisance, leaving a wet mark that takes a long time to dry and bleeding into the paper. The bleeding reduces legibility and can be less than attractive. A simple adjustment can be used to increase the ink flow of a nib. Decreasing is more difficult, so beware of overdoing this adjustment. This adjustment is not for the faint of heart, as the nib can easily be made to write more scratchily if the tines do not balance. (See paragraph 2 at the top of this article.)
Increase the ink flow: Holding the pen on a large open desk with the nib pointed upright, and looking at the underside of the nib (the feed), catch each shoulder of the nib with your thumbnails. Pull gently apart while pressing down gently on the top of the nib. It is best to have light coming through from the back so that one can see the slit gap open. Proceed with caution, testing the pen after each effort. Because the nib will need to be tested after each try, you will want to have paper towels at the ready and not be headed for a dinner engagement, as you will most likely get ink on your fingers.
Decreasing the ink flow is more difficult, as the nib may have to be removed from the pen. Some minor decrease of the ink flow can be accomplished by pinching the shoulders together evenly.
As may be noted from the above, a smooth nib is the result of several dynamics. The process of balancing a nib requires skill and patience. The rewards are great, but pitfalls abound.
A version of this article was first published in the PENnant magazine in February, 2006.
The PENnant is the magazine of Pen Collectors of America.